Set up our Web3 stack
We're now ready to turn our web2 frontend into a web3 app!
We'll use a popular Web3 connection library called RainbowKit to connect to the user's wallet. RainbowKit is straightforward to integrate and supports almost all major wallets.[^connect-libs]
Connection Kits
Besides RainbowKit, similar modern connection options are Web3Modal, Family ConnectKit.
Following RainbowKit's guide, we'll install the package and set up the connection.
npm install @rainbow-me/rainbowkit wagmi viem@2.x @tanstack/react-querySince src/App.tsx is our main entrypoint, let's add our imports and config there. We'll also import the HelloPyusd component we created earlier:
import "@rainbow-me/rainbowkit/styles.css";

import { getDefaultConfig, RainbowKitProvider } from "@rainbow-me/rainbowkit";
import { WagmiProvider } from "wagmi";
import { sepolia, localhost } from "wagmi/chains";
import { QueryClientProvider, QueryClient } from "@tanstack/react-query";
import HelloPyusd from "./components/HelloPyusd";
The above imports bring in the RainbowKit styles, the chains we'll support, and a number of Provider compnents we'll wrap our app in.
Now let's configure RainbowKit. We'll use the getDefaultConfig function to specify how our app works with the WalletConnect modal, as well as the chains it supports.
const config = getDefaultConfig({
  appName: "Hello PYUSD",
  projectId: import.meta.env.VITE_WALLETCONNECT_PROJECT_ID,
  chains: [sepolia, localhost],
});
We'll also set up a QueryClient instance that will be used by Tanstack Query, a state management library we'll use to manage our request/response state.
const queryClient = new QueryClient();Now we can wrap our app in the RainbowKit, Wagmi, and QueryClient providers:
export default function App() {
  return (
    <WagmiProvider config={config}>
      <QueryClientProvider client={queryClient}>
        <RainbowKitProvider>
          <HelloPyusd />
        </RainbowKitProvider>
      </QueryClientProvider>
    </WagmiProvider>
  );
}
And let's edit our HelloPyusd component to show a button for connecting/disconnecting:
import { ConnectButton } from "@rainbow-me/rainbowkit";

export default function HelloPyusd() {
  return (
    <div className='flex flex-col gap-4 items-center justify-center min-h-screen'>
      <h1 className='text-xl'>Hello PYUSD!</h1>
      <ConnectButton />
    </div>
  );
}
We'll notice in our browser console that we're getting a No projectId found error. Let's fix this now.
WalletConnect Project ID
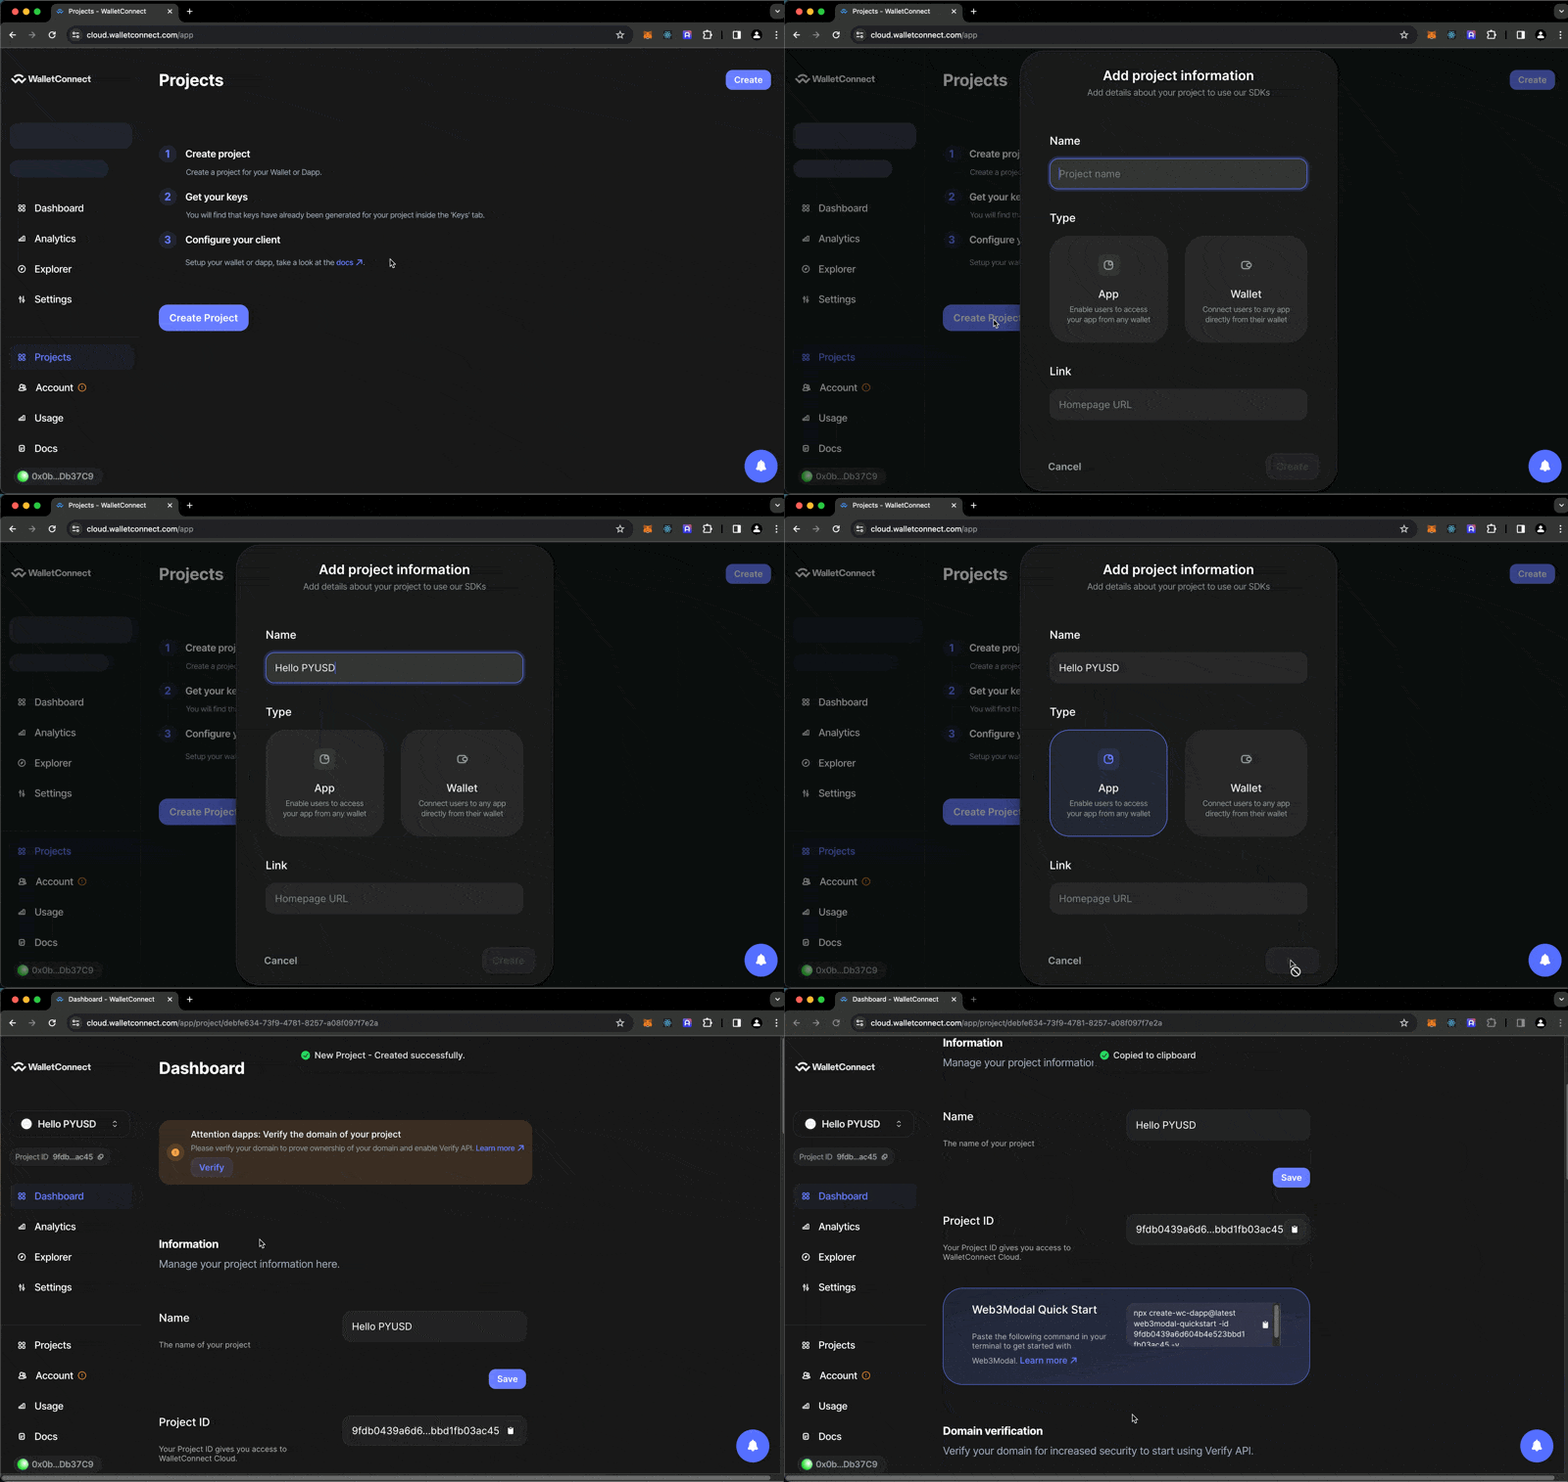
See that weird VITE_WALLETCONNECT_PROJECT_ID variable above? That's pulled in as an environment variable, and it is a WalletConnect Project ID necessary to use Rainbow in its default configuration. We can get our Project ID by signing up at WalletConnect Cloud and creating a new project. You can leave it in "draft" mode for the purposes of this walkthrough:

Once we have our Project ID, let's creat a .env file in the root of our project and add it there:
VITE_WALLETCONNECT_PROJECT_ID=your-project-idAnd let's add it to our .gitignore file:
// .gitignore
.env
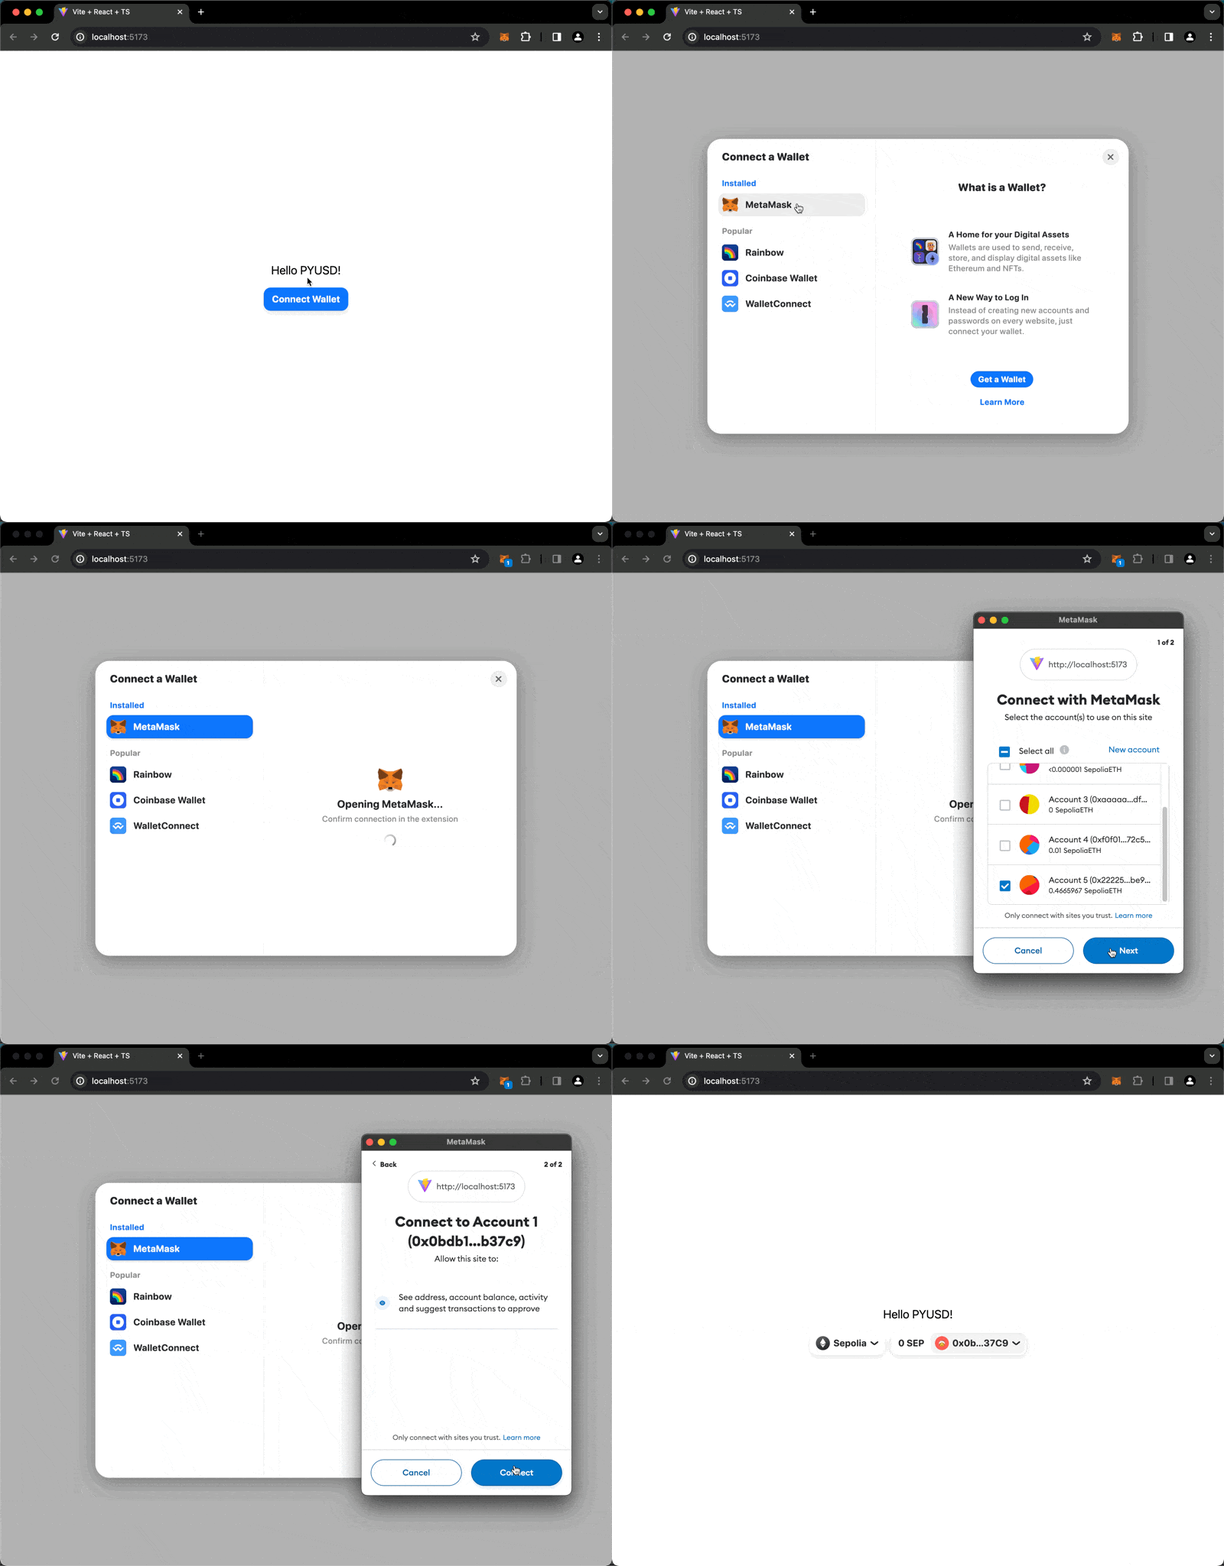
Here's what we have now:

Let's commit our changes:
git add .
git commit -m "Add RainbowKit, set up WalletConnect, add ConnectButton"
Running anvil
We can run a local fork of the blockhain using the anvil command. This will allow us to test our app with a local blockchain.
anvil --fork-url YOUR_RPC_URL --chain-id 1337In this project, we're forking sepolia.